User Manual
REMOTE (PHONE)
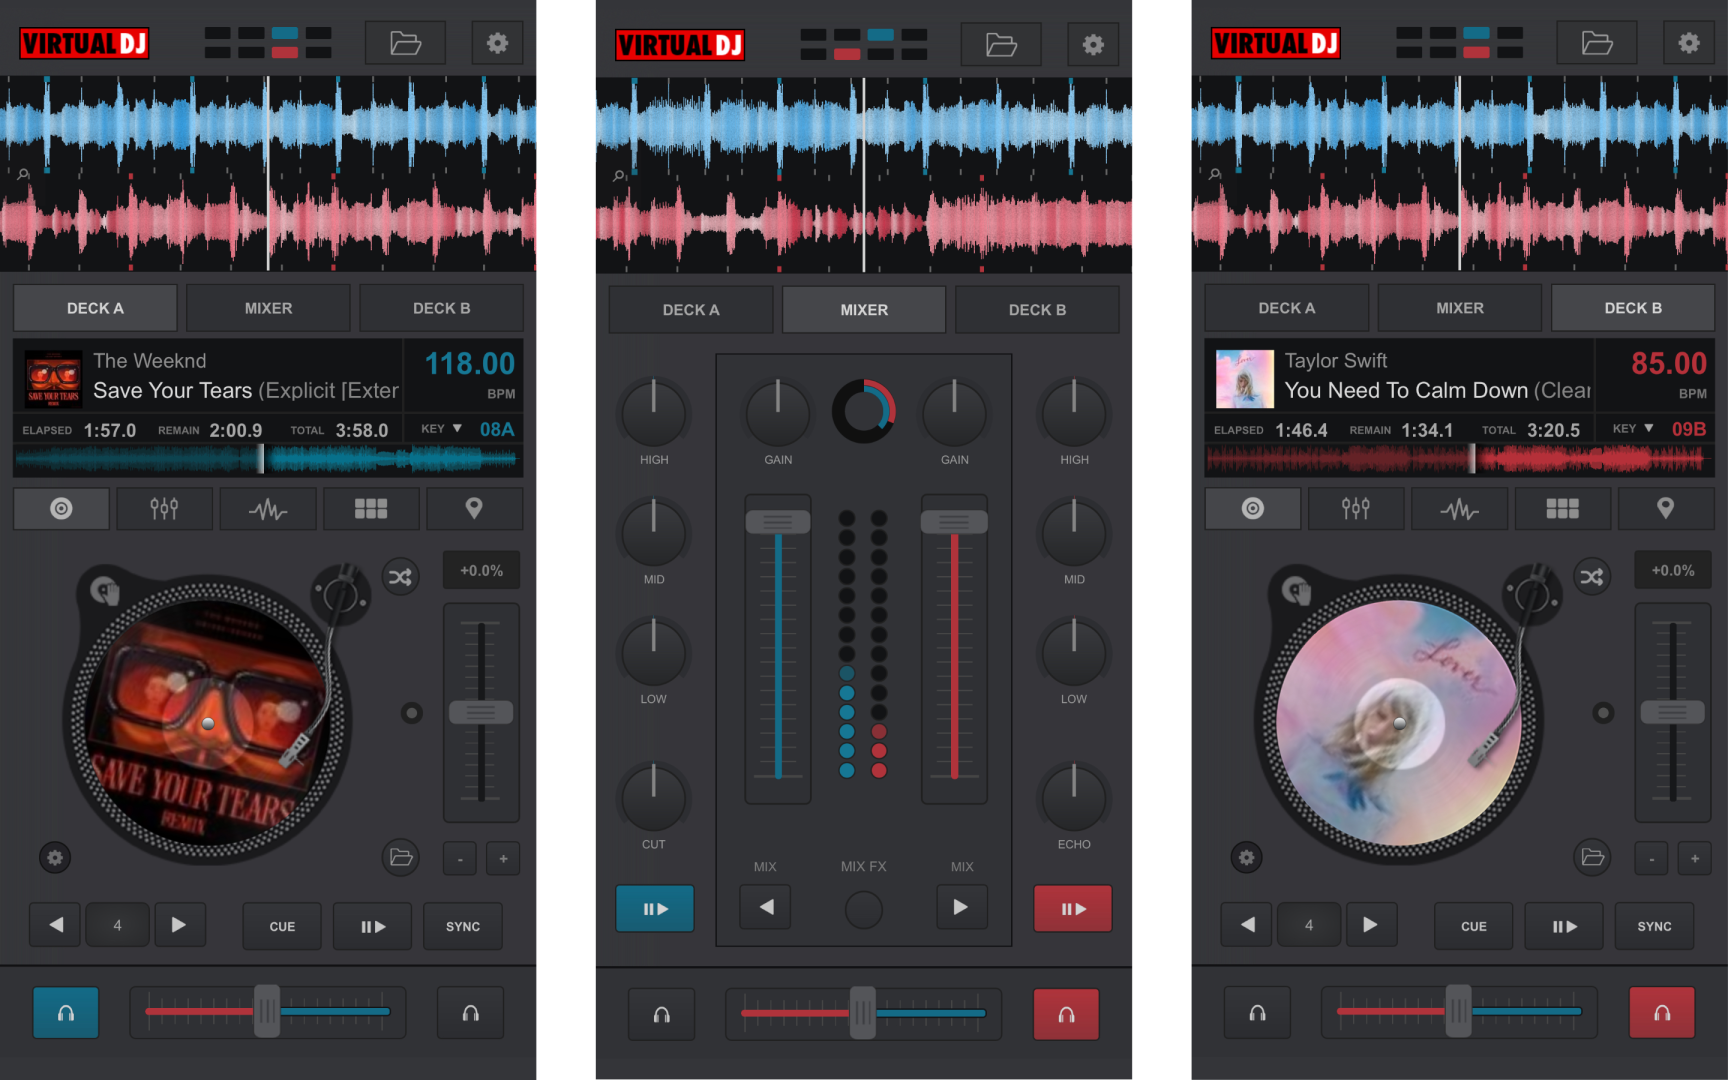
On a phone, the VDJ Remote focusses on deck information and controls from the main interface so that VirtualDJ can be monitored and controlled while away from the main computer. Anything that is done in the remote will directly reflect on the software interface on the computer as well. Multiple remotes can be connected and used at the same time.
APPLICATION CONTROLS
- BEAT KEEPER - The Beat keeper indicates on which beat of the 4 beat bar the track is on.
- BROWSER - Opens the Browser display to access folders, files, and the Sideview.
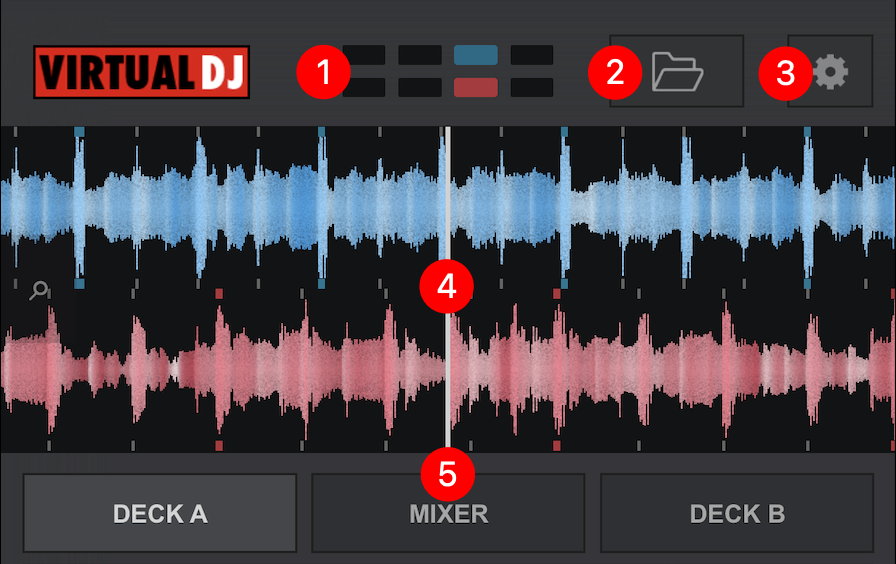
- SETTINGS - Opens the Remote Settings which provides quick access to change the waveform, jogwheel display, and jogwheel type.
- RHYTHM WAVE & CBG - Displays the Rhythm Wave and Computerized Beat Grid of the current file(s) loaded and/or playing in the deck(s). Clicking on the magnifying glass icon to the left provides the ability to increase or decrease the size.
- DECK SELECTION - Changes the view between Deck A, Deck B, or the Mixer.
TRACK INFO & DECK DISPLAY
- TRACK INFO - Displays the Title, Artist, Cover Art, and BPM of the current track, as well as elapsed, remaining, and total time.
The waveform of the track is also displayed and can be used to scrub back and forth through the track.
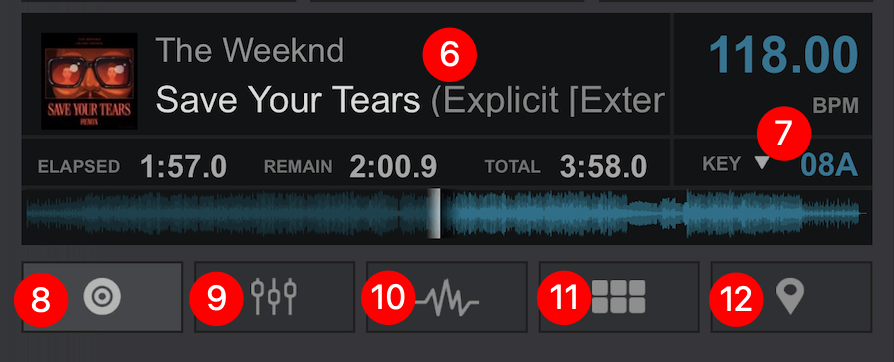
- KEY MENU - Displays the current key of the track. Touching the dropdown arrow will open the Key Menu where you can increase or decrease the current key by using the + and - icons on either side of the key display. Clicking on Match will change the key by up to one semitone on the opposing deck when a track is loaded. If the track has a greater difference than one semitone, it will remain unaffected.
- DECK - Displays the basic deck controls for the currently selected deck.
- EQUALIZER - Displays and controls the equalizer section for the specified deck.
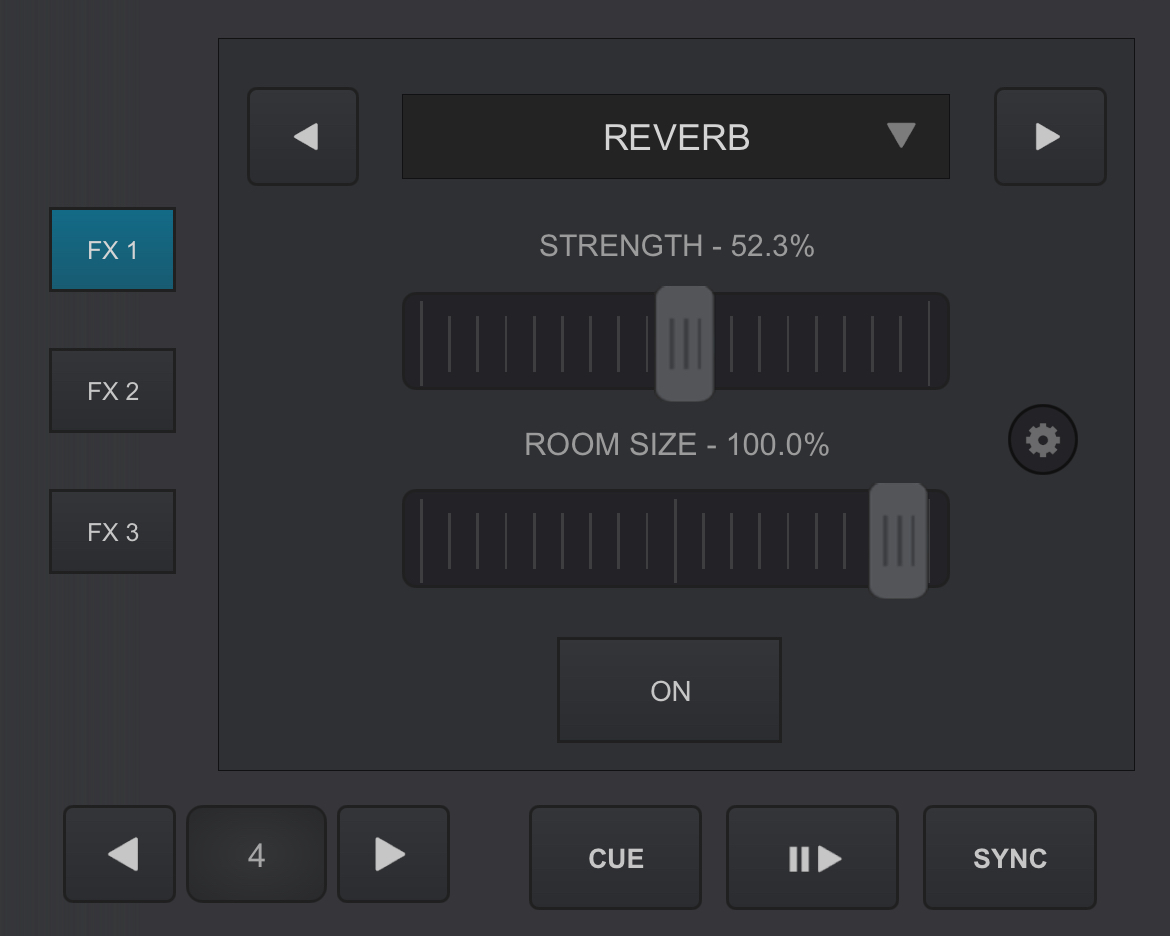
- EFFECTS - Displays and controls the effects section for the specified deck.
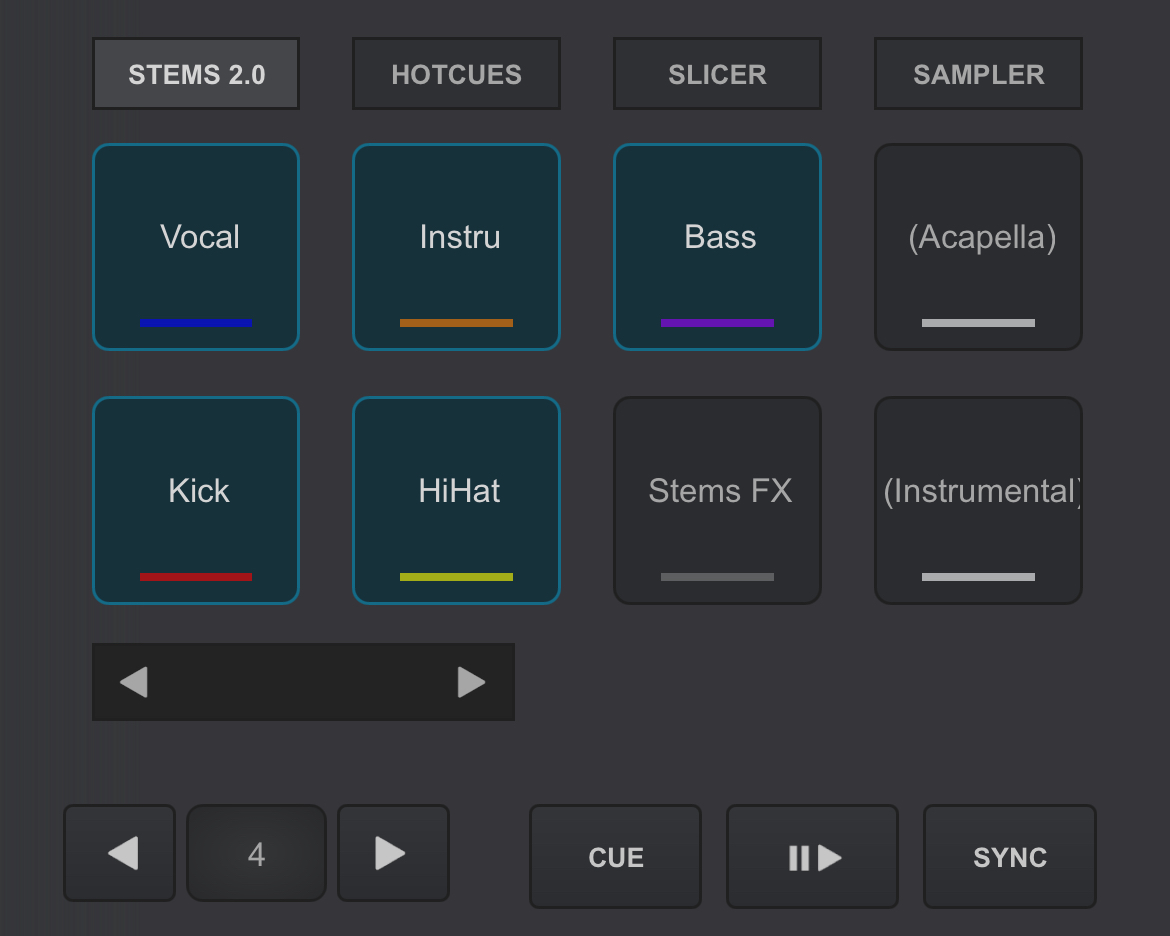
- PADS - Displays and controls the pads section for the specified deck.
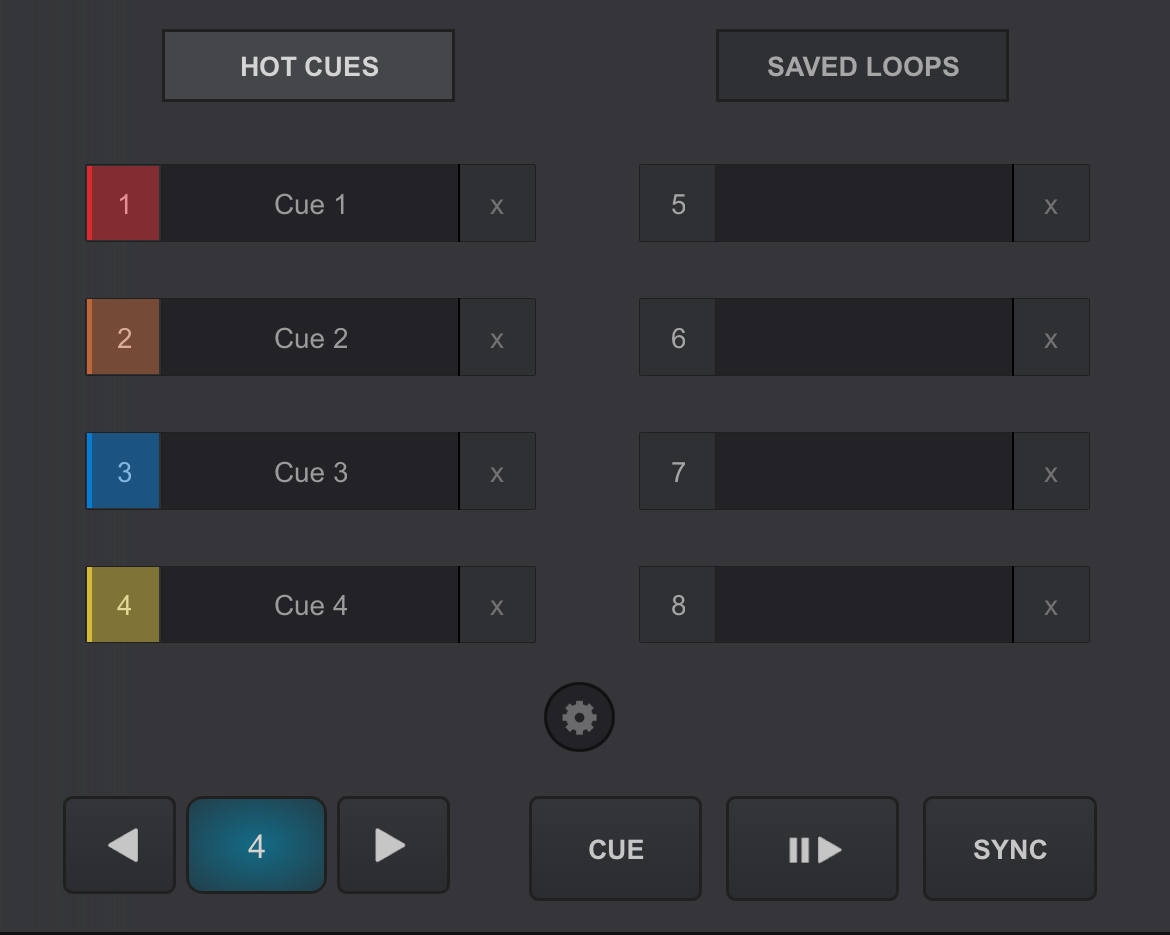
- HOTCUES & SAVED LOOPS - Displays and controls the hotcues and saved loops for the specified deck. 8 of each can be used in this section.
- JOG MODE - Toggle between Vinyl Mode and CD Mode. In Vinyl Mode the Jog Wheel will emulate the sound of a record being scratched when the position is moved. In CD mode the jog wheel will bend the pitch when the position is moved.
- AUTOMIX - Quickly turns Automix on and off
- JOG WHEEL - The Jog Wheel is used to Scratch or Bend the pitch of the track. It also displays the cover art of the track if selected in Settings.
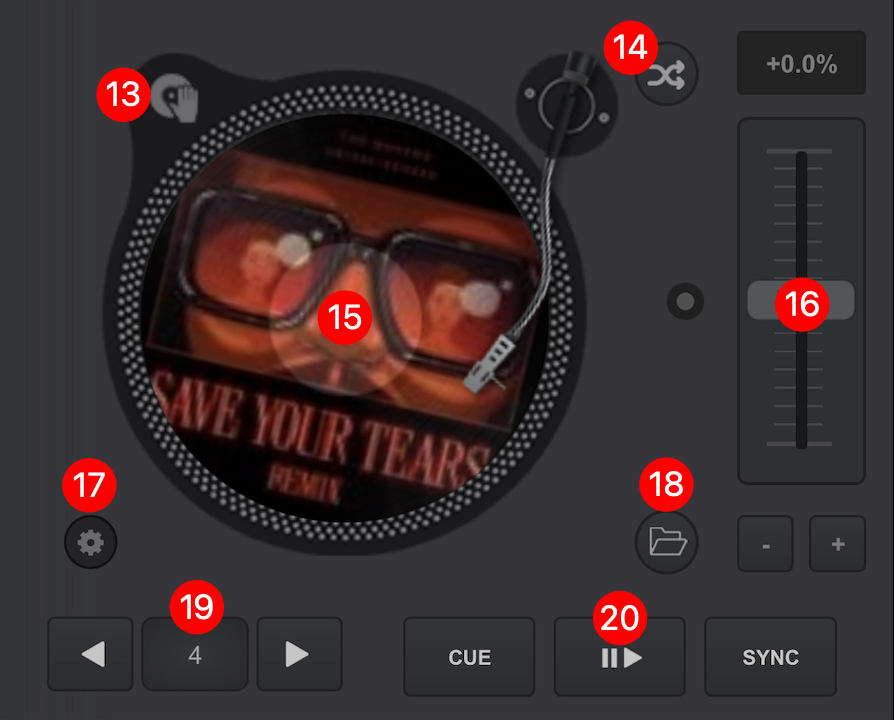
- PITCH CONTROLS - The slider is used to increase and decrease the tempo (BPM) of the track by moving it up and down. Touching the dot to the outside center of the slider will gradually reset the pitch. Double-tapping the button will act as an instant reset.
Pitch Bend buttons (+/-) are offered under the pitch slider to temporary slowdown/speed up the track (Pitch Bend) while pressed. On release the pitch will reset to it’s previous value. - DECK OPTIONS - Tap on the Deck Options button to choose a different behavior for the Basic Control buttons, adjust the Pitch Range, Jog Wheel mode, and enable/disable Automated features. A full explanation of Deck Options can be found here.
- BROWSER - Opens the Browser display to access folders, files, and the Sideview.
- LOOPS - The size of the loop is displayed (number of beats) in the center and when tapped, engages/disengages an automatic loop. Touching the arrows to either side of the loop button will decrease the loop by half or increase it by double it's size.
- TRANSPORT CONTROLS - Offers CUE, Play/Pause, and Sync functions. The behavior of these buttons can be changed in Deck Options.
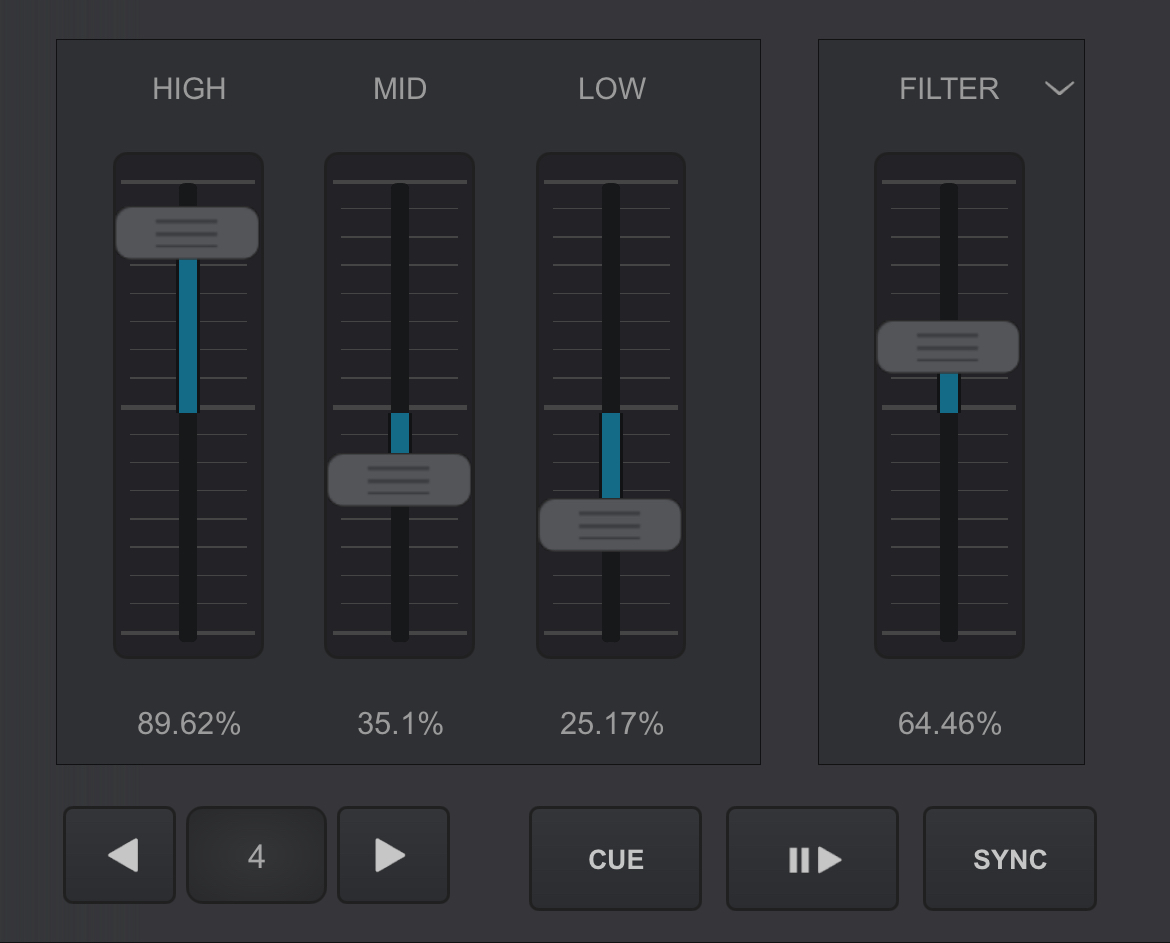
 EQUALIZER
Double tapping a slider of any of the adjusted parameters will snap back to their neutral positions quickly.
 EFFECTS
Effect parameters are controlled by touching and dragging the parameter sliders horizontally.
 PADS
PADSIf a Pad page has any parameters or settings, they will also appear below the pads for quick access.
 HOTCUES & SAVED LOOPS
Touching an empty slot will add a new hotcue or saved loop. Touching the X beside a filled slot will delete the cue or loop.
MIXER
- EQ - Use the HIGH, MID and LOW knobs to adjust the high, mid and low equalizer bands of each of the available mixer channels. Double-tap to reset each one of the EQ bands to zero (off) position. Advanced EQ Modes will be displayed if selected in the EQ MODE MENU of the main interface.
- PLAY/PAUSE - Starts the track on the selected deck. If pressed while playing it will pause playback.
- GAIN - Use the GAIN knob to adjust the gain applied to the loaded track. If the knob is to the middle position (12 o’clock) the output level is set by the software to zero dB in order to normalize the audio levels (0 dB by default or other value defined from Options).
The applied gain value will be displayed under the gain knob. Double-tapping will reset the GAIN to it's central position.
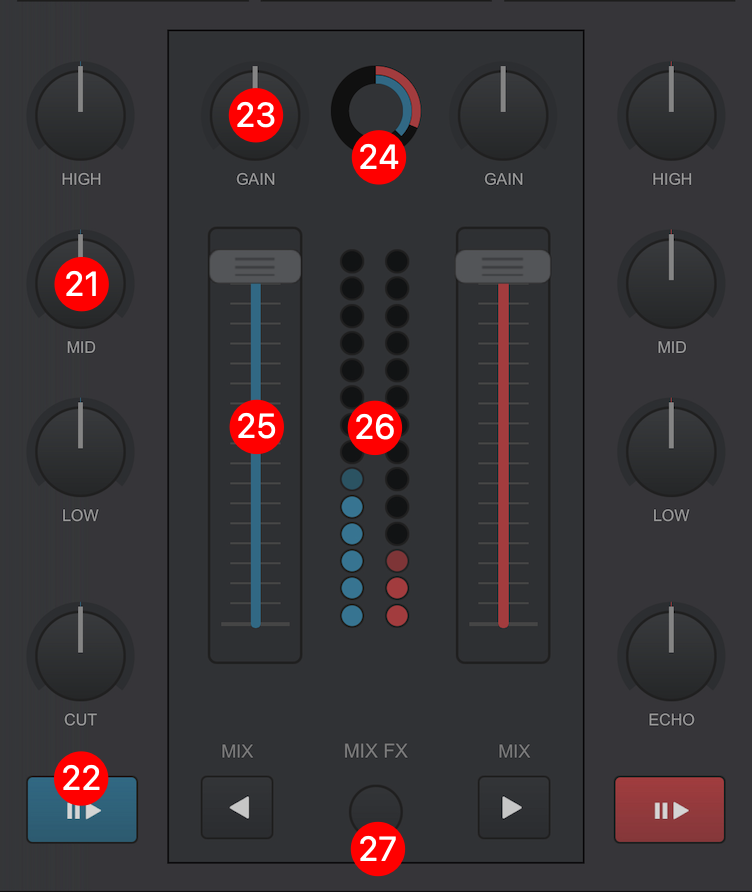
- PHRASE INDICATOR AND SYNC - This displays the current Phrase the track is on. Tapping on it will automatically sync the Phrase of the opposing deck.
- VOLUME FADERS - Used to control the volume of each one of the available mixer’s channels.
- VU METER - Displays the mixer channel's output volume.
- MIX FX - Mix FX provide an easy to use alternative to traditional effects. Simply sliding the crossfader from one deck to the other will automatically add an effect which will assist in blending the 2 decks together seamlessly.
Touching on the Mix FX button will provide a menu of available effects that are automatically activated every time the crossfader is moved. Select from None (for the feature to remain off), Filter, Echo, Reverb, Loop Roll, Noise, or Echo Out.
Tapping the Left/Right arrows will auto-crossfade and will apply MIX FX (if selected).
 BROWSER
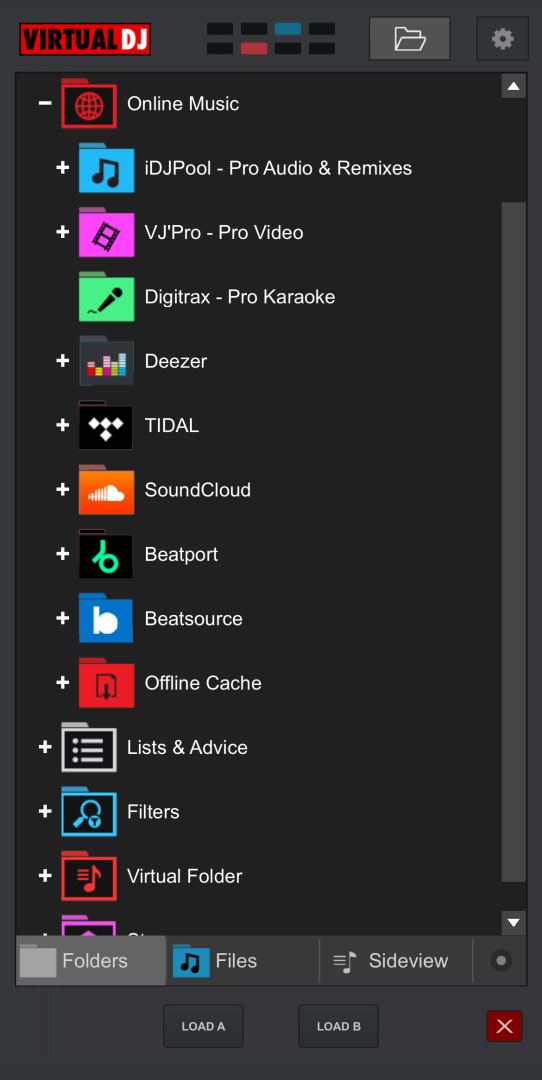
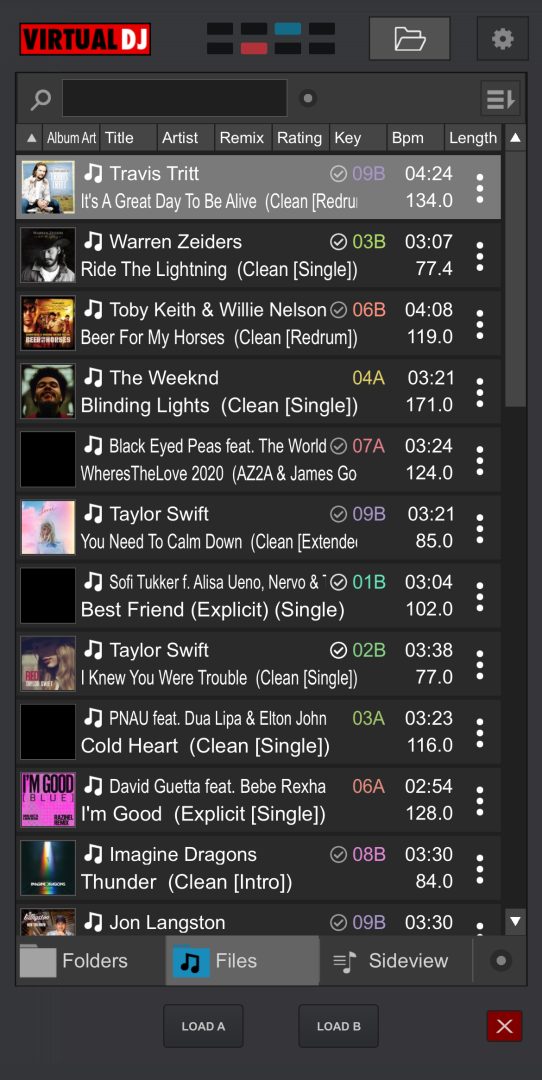
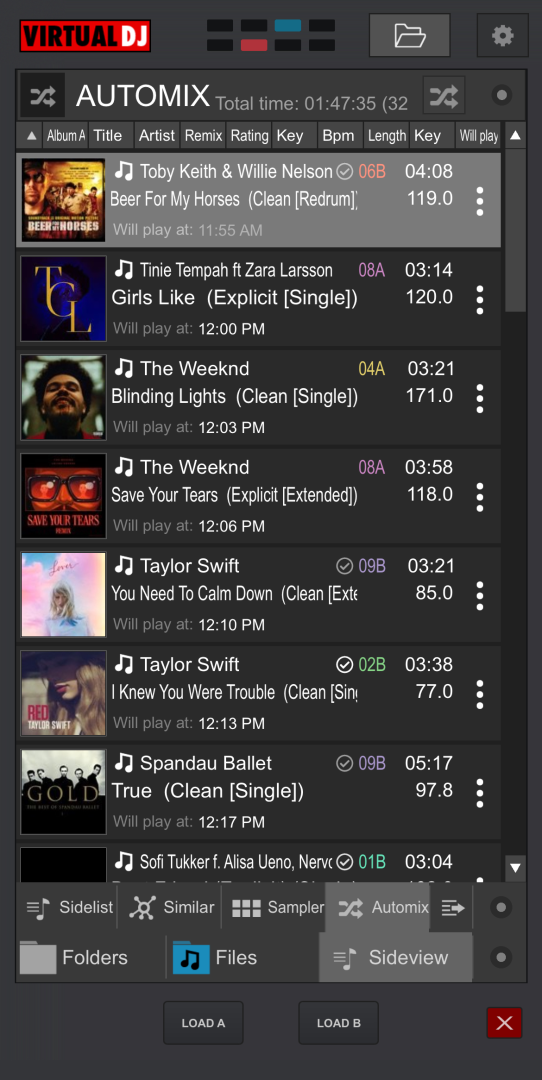
The Browser provides full accessibility of the entire library of files on the host computer and offers a Folder List view, a File List view, and the Sideview by using the buttons at the bottom of the interface.
In the Folder List view, if a folder has Sub-folders, tapping on the button of the Parent Folder will display all of it’s Sub-folders. Double-tapping on a folder will display the folder’s contents in the File List.
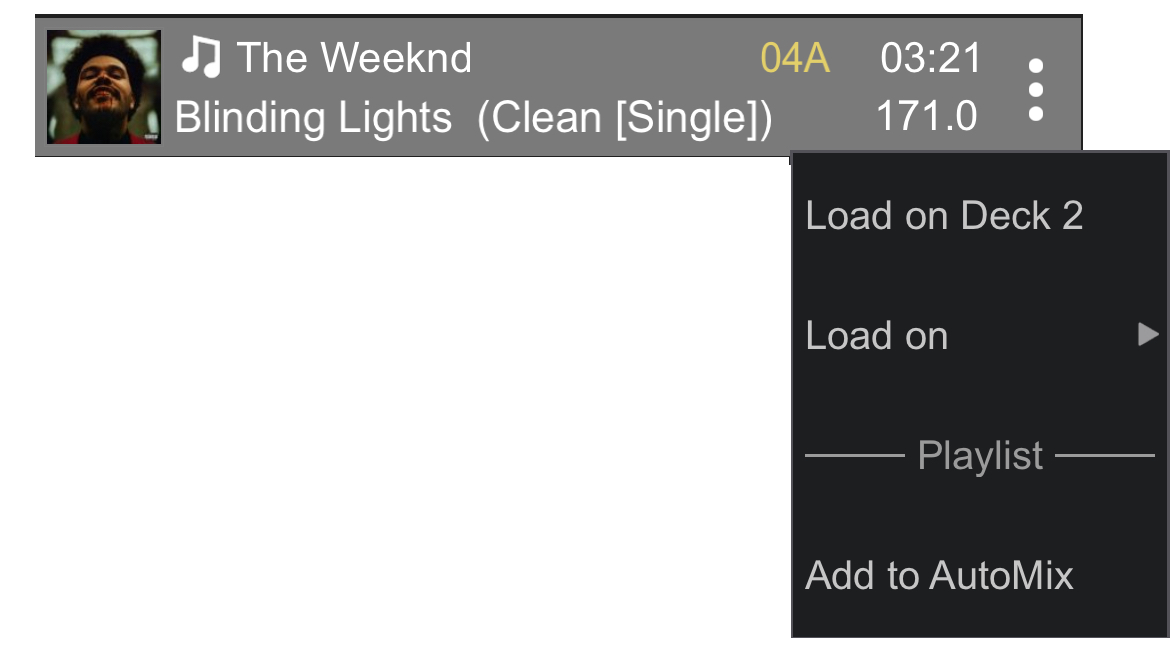
Tapping on the 3 vertical dots to the right of the file will provide the options to load to a deck or add to the Automix playlist.
