MC-6000 MKII
Advanced Audio Setup
The Denon MC6000MKII offers 3 modes for the USB Audio Inputs selected by the switcher (65) at the rear side of the unit. The modes can be selected/switched without re-launching VirtualDJ or power cycling the unit.
REC OUT/MIC
This mode outputs signals for the REC OUT and MIC input to the computer. When you set the USB Audio Output Source Select Switcher (65) to ‘REC OUT/MIC’ position, the audio signals from the USB audio output terminal are set as follows.
- REC OUT output: Output from the USB 1/2 channels to the computer.
- MIC input: Output from the USB 3/4 channels to the computer.
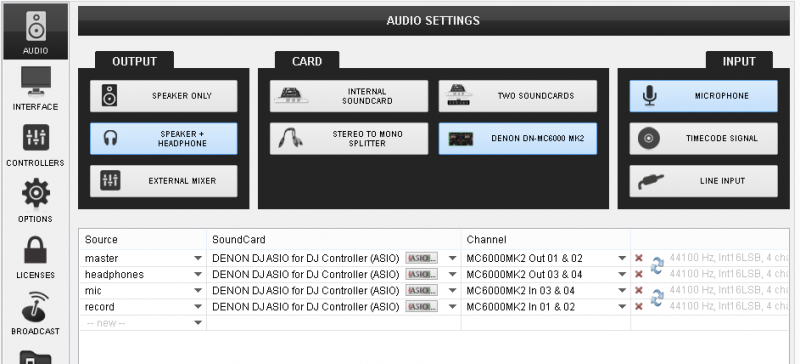
Use this mode to record the Master Output of VirtualDJ, the auxiliary sources (connected to the Line Inputs) and the Microphone Inputs as well.
Go to the AUDIO tab of VirtualDJ config and create the following audio setup.
INPUT CH3/4
This mode outputs signals for the input channels 3/4 to the computer. When you set the USB Audio Output Source Select Switcher (65) to ‘CH3/4’ position, the audio signals from the USB audio output terminal are set as follows.
- Input channel 3: Output from the USB 1/2 channels to the computer.
- Input channel 4: Output from the USB 3/4 channels to the computer.
Use this mode to pass the auxiliary media sources connected to the Line Inputs 3 and 4 to VirtualDJ.
Go to the AUDIO tab of VirtualDJ config and create the following audio setup.
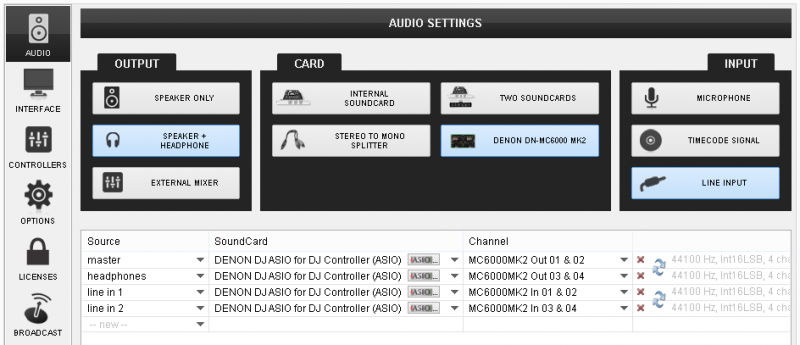
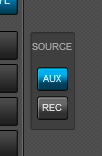
Use the smart buttons on the 4 decks default skin (assigned as deck left linein 1 and deck right linein 2)
LN3/4 THRU to PC
This mode outputs signals for the input channels 3/4 to the computer directly without passing through the mixer of the MC6000MKII (Useful for Timecode Setup - DVS).
. When you set the USB Audio Output Source Select Switcher (65) to ‘LN3/4 THRU’ position, the audio signals from the USB audio output terminal are set as follows.
- LINE3: Output from the USB 1/2 channels to the computer.
- LINE4: Output from the USB 3/4 channels to the computer.
Use this mode to control one or more VirtualDJ decks with Timecode CDs or Vinyls. Connect your CD players or your Turntables to the Line Inputs 3 and 4.
Go to the AUDIO tab of VirtualDJ config and create the following audio setup.
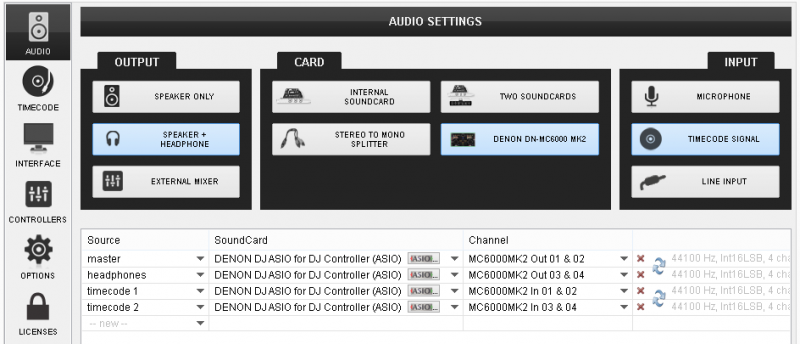
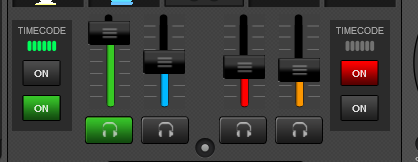 Once the Timecode Inputs are set as above in the Audio setup, the TIMECODE panels will appear at the SCRATCH center panel of the default 4 deck skin.
 Use the ON buttons to enable the timecode control to any of the 4 software decks.
Note. Timecode function requires a Pro Infinity license


