Elite
ADVANCED SETUP
CUSTOM MIDI MAPPING
All the elements (faders, knobs, buttons, rotaries etc) of the Reloop Elite are sending MIDI messages to the connected computer.
Most of the mixer elements are assigned to a VirtualDJ mixer action and the "fake mixer" mode is enabled since the audio mixing is done by the Reloop Elite and not the internal mixer of VirtualDJ. This means that whatever adjustments are made on the internal mixer of VirtualDJ (e.g. moving a Volume fader from the VirtualDJ GUI) will not affect the audio routing or output.
Some other elements offered in the Key list (Controllers tab of VirtualDJ Settings) can be assigned to any VirtualDJ action, but keep in mind that the Hardware operation of some of those will be still executed.
This means that if for example you wish to assign an element from the Mic section to a VirtualDJ action, the respective Microphone operation will be executed by the Reloop Elite if a Microphone is connected to a MIC input.
Mixer UTILITIES
The Reloop Elite is offering a Utilities menu with a few options. Refer to the Reloop Elite Operation Manual for further details
How to access the Utilities menu.
- Hold both SHIFT and BACK buttons for more than 3 seconds, until the LCD displays "FADER SETTINGS".
- Use the BROWSE rotary to navigate through the available settings.
- Push the BROWSE rotary to select a setting and adjust its value.
- Go back or/and Exit the Utilities menu using the BACK button . The unit will exit Utilities automatically if no selection/adjustment is made within a few seconds.
Timecode (DVS)
VirtualDJ is offering DVS (Digital Vinyl System) support for the Reloop Elite. A Pro Infinity or Pro subscription license is required. http://www.virtualdj.com/buy/index.html
Both Mixer Channels can accept PHONO (Timecode Vinyls) and LINE (Timecode CDs) Inputs
- Depending on the type of DVS media CD/Vinyl, connect your Timecode devices at the LINE/PHONO sockets respectively at the rear panel of the Reloop Elite Inputs and make sure the SOURCE switchers at the top panel are set to USB A/B position.
- Use the Utilities of the Elite to set the respective USB Channels to PHONO or LINE depending on the connected DVS device.
[list] - Open the Utilities by holding both SHIFT and BACK buttons for more than 3 seconds, until the LCD displays "FADER SETTINGS".
- Use the BROWSE encoder to navigate to the setting USB OUT ROUTING
- Push the BROWSE encoder. The right-side LCD will display and blink DECK 1 and its selected value below that.
- Push the BROWSE encoder to change the setting. Use the BROWSE encoder and select CD or PHONO depending the DVS type you have connected to this Deck.
- Repeat the previous 2 steps for DECK B.
- Exit the Utilities.
The USB routing is saved across sessions and power-cycling.

[/list]
Recording
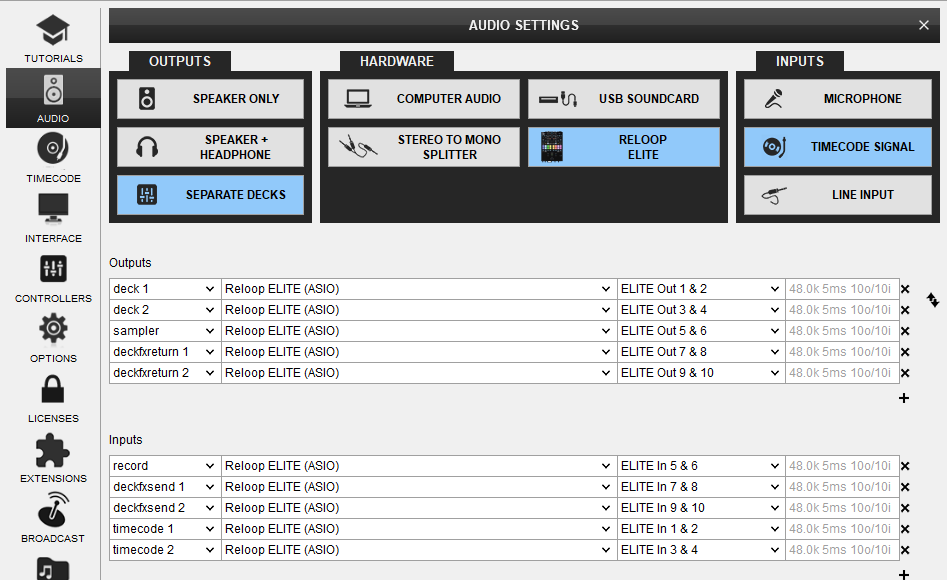
The Reloop Elite audio interface is offering a dedicated REC USB stereo output channel, to record your Main Mix along with Microphone/Aux Inputs and it's pre-defined in VirtualDJ audio setup.
However, the REC USB channel (set as REC OUT by default), could be set differently, so make sure it's set as such.
To record your mix, simply open the MASTER center panel of the VirtualDJ GUI and click to the REC button (or BCAST for broadcasting).


