S-3700
SETUP
Step 1. Connections
Connect each S-3700 to a USB port of your computer using the provided USB cable. If an external analogue dj mixer is used, connect each unit with an Input Channel of the mixer using proper RCA cables.
Connect the unit to a AC Power Outlet using the provided cable and power on the units from the rear switcher, once the connections are made.
Press the MIDI button at the top of the unit to set the S-3700 to MIDI mode and allow controlling a VirtualDJ deck
While the decks initialize their communication with your computer the words "PC MODE" and "Connecting" should appear on the display. Once the initialization is complete, the words "PC MODE" and "Completed!" will appear on the display. Now your decks are ready !
Note : The Link connection cannot be used in MIDI mode. Each S-3700 unit needs to be connected via a USB port to the computer
Step 2. Drivers
Windows : Download and install the Denon ASIO drivers from https://www.denondj.com/downloads#legacy
Note : Before starting VirtualDJ, open the DENON DJ ASIO Control Panel and make sure that you see two devices listed, and that BOTH have a check mark in front of them. Close the DENON DJ ASIO control panel and then start VirtualDJ and continue with the sound configuration below.
Mac OSX : No drivers is required to be installed for Mac OSX computers.
Update the firmware of each unit to the latest version from https://www.denondj.com/downloads#legacy
Step 3. VirtualDJ
Install VirtualDJ from http://www.virtualdj.com/download/index.html (in case you have not done already)
Start VirtualDJ and login with your Account credentials. A Pro Infinity or a Pro Subscription License is required.
Find a detailed installation procedure at http://www.virtualdj.com/manuals/virtualdj/quickstart.html
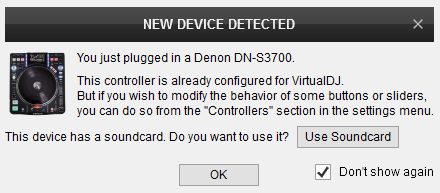
A detection window will appear when the unit is first connected with VirtualDJ, verifying proper connection
Click on the Use Soundcard button in order VirtualDJ to apply the pre-defined audio configuration using the built-in sound-card of the unit. Speakers need to be connected to the rear panel of the unit in this case.
Click to OK

The unit is now ready to operate with VirtualDJ.
Controls


